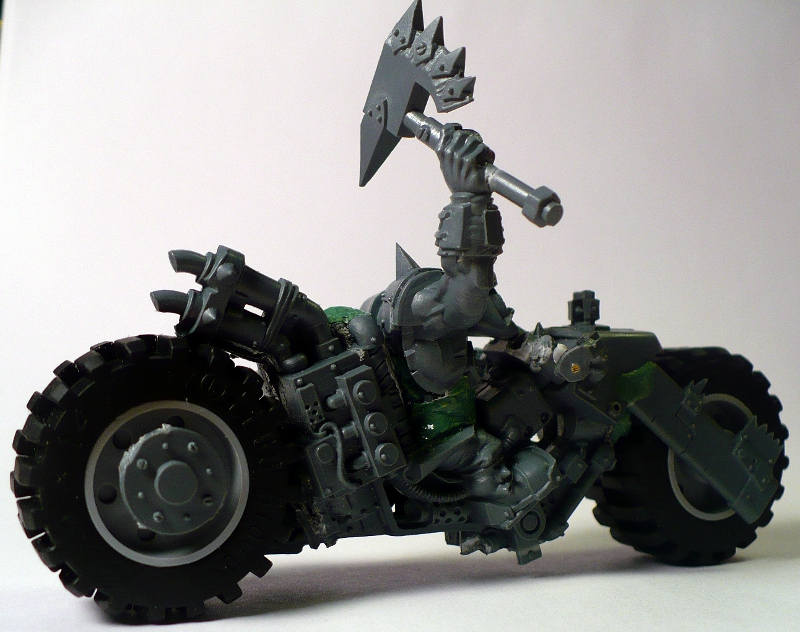
Warbiker Nob #3
On: 3.15.2013
So work continues on my "Assault on Black Reach Deffkopta to Warbiker Nob" project. #3 is basically done, note the Waaagh! Banner (of Gork... or possibly Mork) upgrade. This guy was pretty fun. I also magnetized the arm that is carrying the Banner so that I can put him away for storage. It also allows the banner to rotate depending on the needs of Close Assault.
We'z kom bak from de Void!
On: 3.14.2013
Well, lots of 40K activity in the Wolfhound den this week. I'm updating for 6th edition after taking a 2 year break following the arrival of my 2nd wee squig (a boy, now I have one of each).
This is the list I'm building towards as my getting into the new edition list. I've not yet actually played 6th so any feedback and helpful tips would be appreciated.
Items in Orange are built/not painted.
Items in Lime Green are painted/ready to krump.
This is the list I'm building towards as my getting into the new edition list. I've not yet actually played 6th so any feedback and helpful tips would be appreciated.
Items in Orange are built/not painted.
Items in Lime Green are painted/ready to krump.
1500 Pts - Codex: Orks Roster - Wolfhound's 1st Waaaghin' SS (LSSGT)
Total Roster Cost: 1499
HQ: Warboss (1#, 135 pts)
1 Warboss, 135 pts = (base cost 60 + Attack Squig 15 + Cybork Body 10 + Warbike 40 + Big Choppa 5 + Shoota/Skorcha Kombi-weapon 5)
Troops: Shoota Boyz (13#, 117 pts)
12 Boyz, 72 pts = 12 * 6
1 Trukk, 45 pts = (base cost 35 + Red Paint Job 5 + Reinforced Ram 5)
Troops: Shoota Boyz (13#, 117 pts)
12 Boyz, 72 pts = 12 * 6
1 Trukk, 45 pts = (base cost 35 + Red Paint Job 5 + Reinforced Ram 5)
Troops: Gretchin (11#, 40 pts)
10 Gretchin, 30 pts = 10 * 3
1 Runtherd, 10 pts
Elite: Nob Bikers (10#, 580 pts)
1 Nob Bikers, 0 pts
1 Painboy, 80 pts = (base cost 50 + Cybork Body 5 + Warbike 25)
1 Nobz, 65 pts = (base cost 20 + Warbike 25 + Cybork Body 5 + Waaagh! Banner 15)
1 Nobz, 75 pts = (base cost 20 + Warbike 25 + Cybork Body 5 + Power Klaw 25)
1 Nobz, 55 pts = (base cost 20 + Warbike 25 + Cybork Body 5 + Big Choppa 5)
1 Nobz, 55 pts = (base cost 20 + Warbike 25 + Cybork Body 5 + Shoota/Skorcha Kombi-weapon 5)
1 Nobz, 50 pts = (base cost 20 + Warbike 25 + Cybork Body 5)
1 Nobz, 50 pts = (base cost 20 + Warbike 25 + Cybork Body 5)
1 Nobz, 50 pts = (base cost 20 + Warbike 25 + Cybork Body 5)
1 Nobz, 50 pts = (base cost 20 + Warbike 25 + Cybork Body 5)
1 Nobz, 50 pts = (base cost 20 + Warbike 25 + Cybork Body 5)
Elite: Lootas (5#, 75 pts)
5 Lootas, 75 pts = 5 * 15
Elite: Lootas (5#, 75 pts)
5 Lootas, 75 pts = 5 * 15 (3 are built)
Fast Attack: Dakkajet (1#, 125 pts)
1 Dakkajet, 125 pts = (base cost 90 + Red Paint Job 5 + TL Supa Shoota x3 30)
Heavy Support: Battlewagon (1#, 135 pts)
1 Battlewagon, 135 pts = (base cost 90 + Armour Plates 10 + Deff Rolla 20 + Red Paint Job 5) + Big Shoota x2 10
: Aegis Defence Lines (2#, 100 pts)
1 Aegis Defence Lines, 50 pts
1 Gun Emplacement, 50 pts = (base cost 0 + Quad-gun 50)
Validation Report:
c-1. File Version: 1.16 For Bug Reports/www.ab40k.org; 1. Army: Codex: Orks; b-1. Roster Options: Named or Special Characters; a-1. Scenario: Normal Mission; b-2. Levels of Alliance: Battle Brothers
Roster satisfies all enforced validation rules
Composition Report:
HQ: 1 (1 - 2)
Elite: 3 (0 - 3)
Troops: 3 (2 - 6)
Fast: 1 (0 - 3)
Heavy: 1 (0 - 3)
Fort: 1 (0 - 1)
Created with Army Builder® - Try it for free at http://www.wolflair.com
Variant 1 - from Feedback from Mad Pat - drop the Red Paint on the Dakkajet and get Boarding Planks on the Wagon (and/or Trukks).
Tutorial: Warbiker Nob from AoBR Deffkopta
On: 9.08.2010
This is another attempt at a blog based tutorial. Some pictures are blurry, but luckily I think I was still able to get the jist of everything down in picture form.
Step 1: Materials
Here we begin with 1 AoBR Deffkopta and 1 AoBR Nob. The tires are from Lego (the 30mm x 14mm knobby tire) which you can buy online by itself or from a local Lego store. In my case, I got mine from the Lego store at Stonebriar Mall in Frisco, Texas. I got about 24 of them for just under $9.

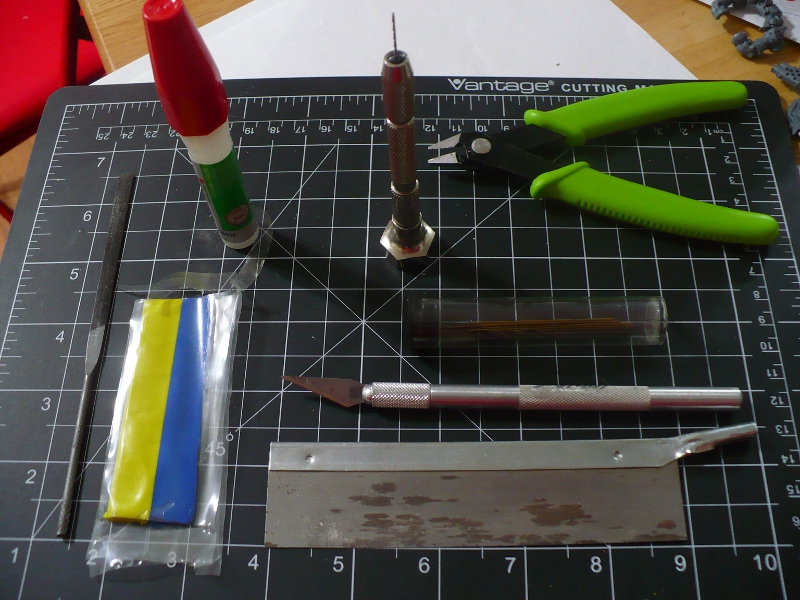
Step 2: Tools
Just a snapshot of some of the tools I used to do this project. The blade of a hobby saw (this was vital for my project, cutting straight lines!) for cutting straight lines, sprue cutter, pin vise with #66 drill bit, 1/32 brass rod, superglue, hobby blade, and a file.
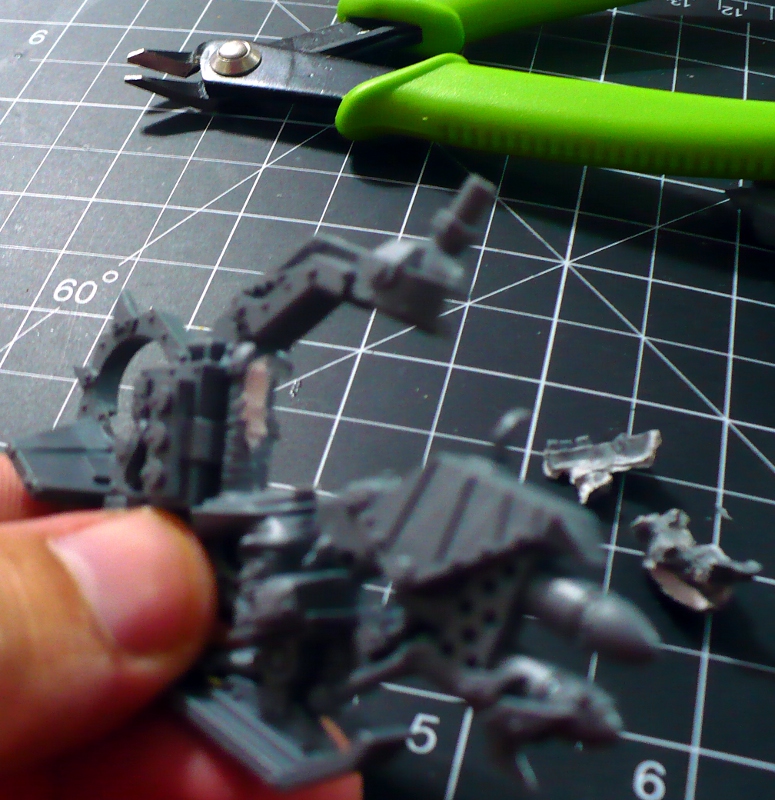
Step 3: Cutting out the Ork pilot
Here you see snips I made in the plastic with the sprue cutters. This weakened the model so that I was able to just tear out the pilot by bending him.
I just used the sprue cutters like a pair of pliers and pried out the pilot in chunks. You can see him lying there in the background. Repeat for the other side. Then use a file and the hobby knife to clean up the seat (smooth it down).
Step 4: Cutting off the landing skids
Hobby saw blade coming to the rescue by being so straight. This allowed me to almost perfectly cut along the lines formed by the sculpt.

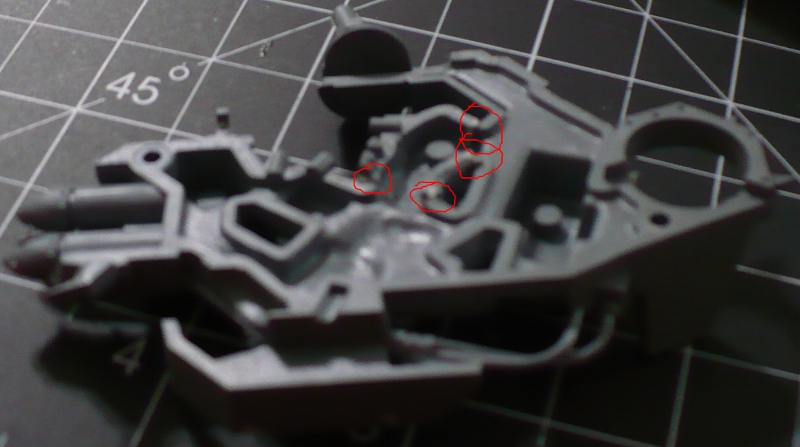
Step 5: Cutting off the lower rokkits and the caps of the top ones.
Again, you can see the straight line that the saw blade provides as I slice off the area that will be the wheel well of the front wheel. I leave the top pair of missiles to act as the mounting point for Dakkagunz later.

Step 6: Cutting off the tail assembly
Hobby saw blade once again. Basically I followed the mold lines and totally removed the tail rotor, leaving the engines. One of the sets of hoses comes off due to a small box that protrudes. I still haven't glued the two halves together... I just hold them together while I cut so that they're even.
You can also see I've cut off the overhead prop... this is a lot easier to do if the halves are not yet glued together. Note I preserved the "belt" detailing in the plastic... that's because I need that!

Step 7: Making room for the tire chain/belt
Here I slice off a section of engine detailing to file down and make a flat area where I will mount my "chain."
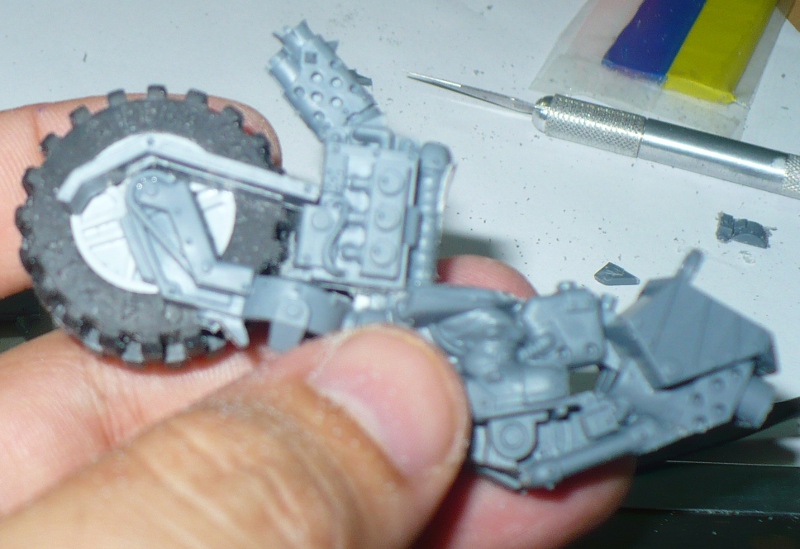
Step 8: Attach rear tire assembly
Here you see a better shot of how much of the prop assembly that got cut off. You also see what happens to the prop "arm"... it becomes the bike chain. One of the landing skids also becomes the "mud guard" for the bike chain. This piece is not decorative, it provides structural strength by giving me a second attachment point for the tire which is glued to the bike chain "arm"... there's also a blob of greenstuff up inside what used to be the "ball socket" prop blade housing that's now on the underside of the bike. That greenstuff also gives me a bit more support.
ps - The tire is not centered using this method. It doesn't bother me because I think it looks cooler this way, but if it'll bother you to not have a centered rear tire... you've been warned. :)
Step 9: Attach front tire assembly
The picture explains it all I should think. One of the propellar blades becomes the two front tire spokes. I filed down the sides of the lego tire until it was smooth and filed down the inside surface of the prop blade so that they'd mesh up. Then I just glued it all to the front cowl. You can see the "hub" from the propellar blade now becomes the reverse "hubcab" of the rear tire.

Step 10: Slice off the nob
Cut off the legs (cut all of the hip/belt area, you can always file down, but it's difficult to add back material). Sorry, blurry.
Step 11: Reattach instruments, minus handlebars
Cut off the handlebars and reattached the dials. Sorry, blurry.

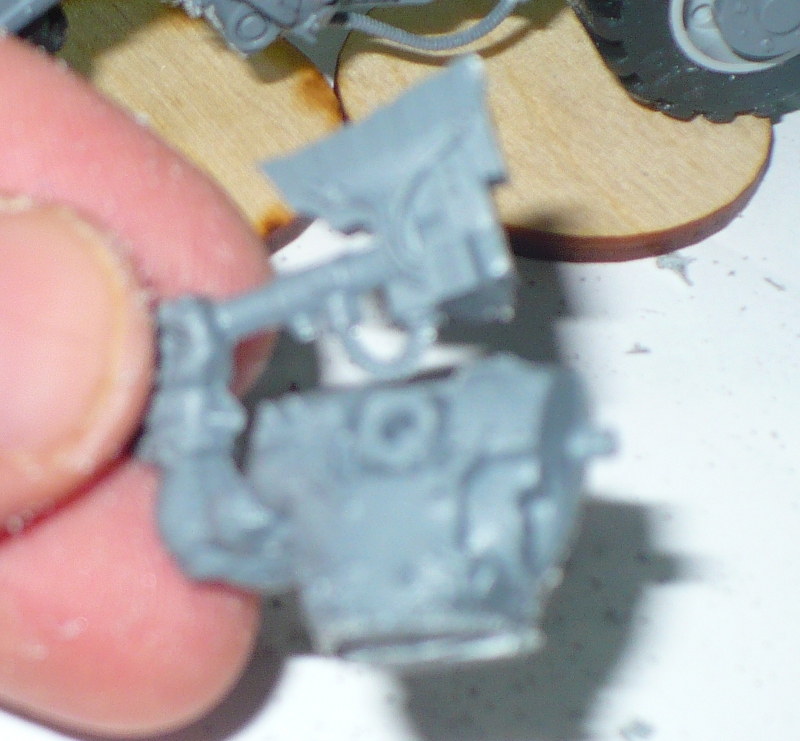
Step 12: Greenstuff the nob
Blob of greenstuff will form the link. There's also a tiny blob in the center of the nobz back as well (so that it attaches to the vertical seat back).

Coming together! I just smoothed down the greenstuff with the flat side of my hobby knife (I just used spit to keep it "slick" so that it wouldn't stick to the green stuff). Note I cut off the front "radiator" and replaced it with an upside down Space Marine backpack... dunno why... thought it would be fun. Next time I leave the original radiator in place. :)

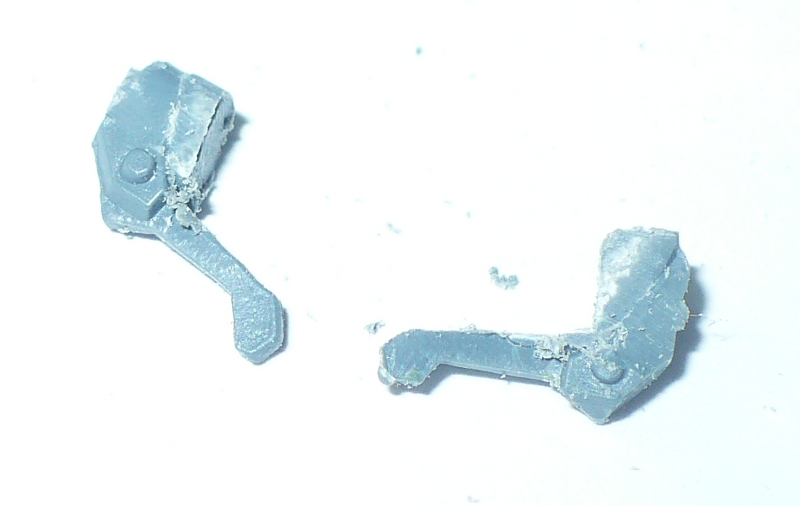
Step 13: Putty in hole left from prop assembly
There's a hole left up top where you cut off the rotor assembly. Here I used a spot of greenstuff and the front of the other landing skid to fill it in. You can also see small pilot holes I drilled into the exhaust pipes for when I drill them out later.

Step 14: Remove the handlebars and brakes from the molded hands of the pilot
Much, much careful sawing with the hobby blade and filing.
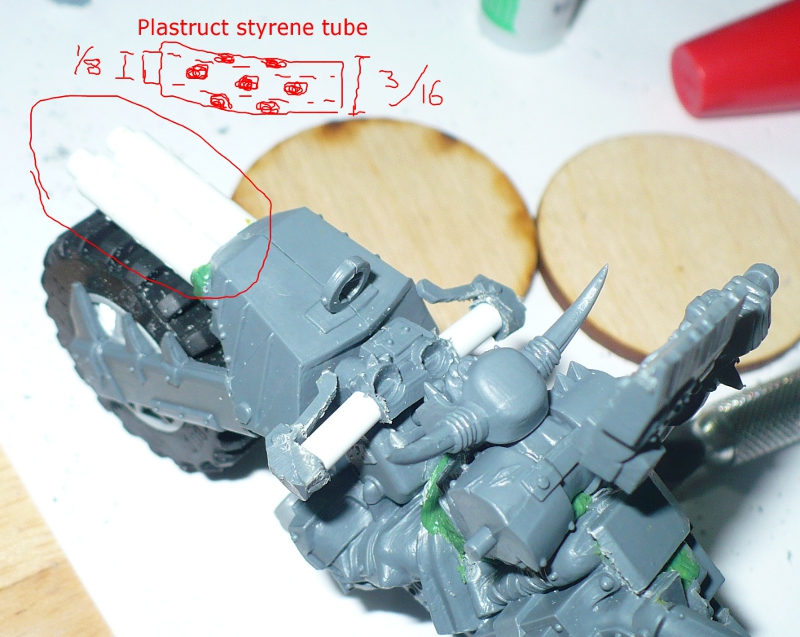
Step 15: Attach handlebars and Dakkagun barrels
1/8th styrene tube for the win! Due to overexposure of the flash, you can't really see the detail of the Dakkaguns. However, I drew a crude drawing showing how to do the styrene and drill the holes. As you can see, I used greenstuff to attach the barrels.
Step 16: Attach step ... done
At the very bottom you can see I cut the tips off the other pair of prop blades to form a small "step up" as well as rippy side bits. I took this photo on top of two 40mm discs to show how it'll look on a bike base.
With that... I'm done. 4 hours of work.

If you liked this tutorial please let your Ork friends know about it or leave a comment! :)
As a bonus, here are some other ones (found elsewhere on this blog).
#1 - My prototype/proof of concept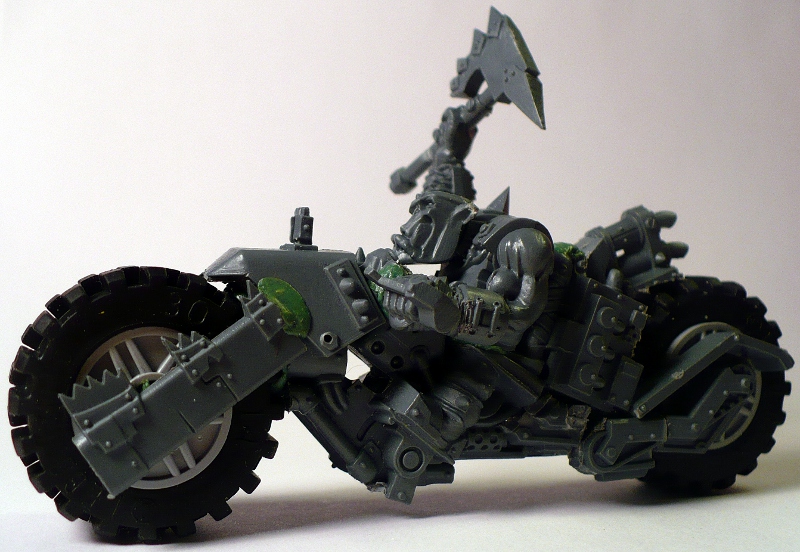 #3 Nob

Step 1: Materials
Here we begin with 1 AoBR Deffkopta and 1 AoBR Nob. The tires are from Lego (the 30mm x 14mm knobby tire) which you can buy online by itself or from a local Lego store. In my case, I got mine from the Lego store at Stonebriar Mall in Frisco, Texas. I got about 24 of them for just under $9.
Step 2: Tools
Just a snapshot of some of the tools I used to do this project. The blade of a hobby saw (this was vital for my project, cutting straight lines!) for cutting straight lines, sprue cutter, pin vise with #66 drill bit, 1/32 brass rod, superglue, hobby blade, and a file.
Step 3: Cutting out the Ork pilot
Here you see snips I made in the plastic with the sprue cutters. This weakened the model so that I was able to just tear out the pilot by bending him.
I just used the sprue cutters like a pair of pliers and pried out the pilot in chunks. You can see him lying there in the background. Repeat for the other side. Then use a file and the hobby knife to clean up the seat (smooth it down).
Step 4: Cutting off the landing skids
Hobby saw blade coming to the rescue by being so straight. This allowed me to almost perfectly cut along the lines formed by the sculpt.
Step 5: Cutting off the lower rokkits and the caps of the top ones.
Again, you can see the straight line that the saw blade provides as I slice off the area that will be the wheel well of the front wheel. I leave the top pair of missiles to act as the mounting point for Dakkagunz later.
Step 6: Cutting off the tail assembly
Hobby saw blade once again. Basically I followed the mold lines and totally removed the tail rotor, leaving the engines. One of the sets of hoses comes off due to a small box that protrudes. I still haven't glued the two halves together... I just hold them together while I cut so that they're even.
You can also see I've cut off the overhead prop... this is a lot easier to do if the halves are not yet glued together. Note I preserved the "belt" detailing in the plastic... that's because I need that!
Step 7: Making room for the tire chain/belt
Here I slice off a section of engine detailing to file down and make a flat area where I will mount my "chain."
Step 8: Attach rear tire assembly
Here you see a better shot of how much of the prop assembly that got cut off. You also see what happens to the prop "arm"... it becomes the bike chain. One of the landing skids also becomes the "mud guard" for the bike chain. This piece is not decorative, it provides structural strength by giving me a second attachment point for the tire which is glued to the bike chain "arm"... there's also a blob of greenstuff up inside what used to be the "ball socket" prop blade housing that's now on the underside of the bike. That greenstuff also gives me a bit more support.
ps - The tire is not centered using this method. It doesn't bother me because I think it looks cooler this way, but if it'll bother you to not have a centered rear tire... you've been warned. :)
Step 9: Attach front tire assembly
The picture explains it all I should think. One of the propellar blades becomes the two front tire spokes. I filed down the sides of the lego tire until it was smooth and filed down the inside surface of the prop blade so that they'd mesh up. Then I just glued it all to the front cowl. You can see the "hub" from the propellar blade now becomes the reverse "hubcab" of the rear tire.
Step 10: Slice off the nob
Cut off the legs (cut all of the hip/belt area, you can always file down, but it's difficult to add back material). Sorry, blurry.
Step 11: Reattach instruments, minus handlebars
Cut off the handlebars and reattached the dials. Sorry, blurry.
Step 12: Greenstuff the nob
Blob of greenstuff will form the link. There's also a tiny blob in the center of the nobz back as well (so that it attaches to the vertical seat back).
Coming together! I just smoothed down the greenstuff with the flat side of my hobby knife (I just used spit to keep it "slick" so that it wouldn't stick to the green stuff). Note I cut off the front "radiator" and replaced it with an upside down Space Marine backpack... dunno why... thought it would be fun. Next time I leave the original radiator in place. :)
Step 13: Putty in hole left from prop assembly
There's a hole left up top where you cut off the rotor assembly. Here I used a spot of greenstuff and the front of the other landing skid to fill it in. You can also see small pilot holes I drilled into the exhaust pipes for when I drill them out later.
Step 14: Remove the handlebars and brakes from the molded hands of the pilot
Much, much careful sawing with the hobby blade and filing.
Step 15: Attach handlebars and Dakkagun barrels
1/8th styrene tube for the win! Due to overexposure of the flash, you can't really see the detail of the Dakkaguns. However, I drew a crude drawing showing how to do the styrene and drill the holes. As you can see, I used greenstuff to attach the barrels.
Step 16: Attach step ... done
At the very bottom you can see I cut the tips off the other pair of prop blades to form a small "step up" as well as rippy side bits. I took this photo on top of two 40mm discs to show how it'll look on a bike base.
With that... I'm done. 4 hours of work.
If you liked this tutorial please let your Ork friends know about it or leave a comment! :)
As a bonus, here are some other ones (found elsewhere on this blog).
#1 - My prototype/proof of concept
#3 NobUPDATE (9/13/2010): You can order Lego parts online here: Lego Pick a Brick online store. The parts I used were "Tyre Normal Wide Ø30,4 X 14" and "Rim Wide 18/14 W. Cross Ø4.8"
Warbiker Nob from AoBR Deffkopta
On: 9.07.2010
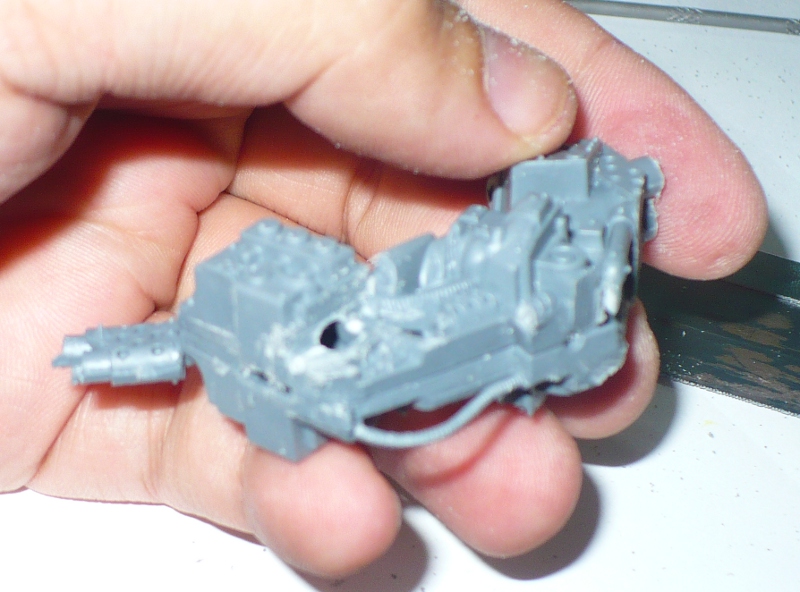
I will do another one of these, and the next time I'll take pictures of it, step by step. However, for those who are savvy with conversion work, here it is unprimered so you can see where everything came from.
The only things that didn't come from the Assault on Black Reach set are the tires and the green stuff (plus 1 tiny piece of styrene rod to rebuild the handlebar). The tires are from my local Lego store (though you can get them online). It's the 30mm x 14mm knobby one.
Believe it or not, it fits on a bike base (barely). The centerpoint of the tires just rests on the edges of the base. When I figure out how I want to do the guns, they'll go into those pinholes up front.
Waaaghin' SS Test Model
On: 6.17.2010
I spent like four hours mixing different swatches of paint but only did a 2 hour "quickie" figure. The "front view" is blurry except for the base, but it isn't the purpose of the picture anyway. The backside is really the image I was wanting.
There seems to be some heavy pixelation that hopefully I'll have fixed when I take my "real" pics. However, for test images I think they'll do.


Dunno if you can tell or not, but that "Feldgrau" actually does have a slight greenish tint to it. The ork skin is also more "yellow" than my blueish tinted regular "Ooliganz" paint job (Reaper MSP Pale Green is yellow tinted, Jade Green is blue tinted). I like it because since I use Muddy Olive in both the skin mixture and the uniform mixture, I think it really unifies the look.
The awesome base if from Dragon Forge Design's Urban Rubble Wasteland product line.
This one was all done with a brush over white Tamiya spray primer. I may experiment with the trusty airbrush next.
There seems to be some heavy pixelation that hopefully I'll have fixed when I take my "real" pics. However, for test images I think they'll do.
Dunno if you can tell or not, but that "Feldgrau" actually does have a slight greenish tint to it. The ork skin is also more "yellow" than my blueish tinted regular "Ooliganz" paint job (Reaper MSP Pale Green is yellow tinted, Jade Green is blue tinted). I like it because since I use Muddy Olive in both the skin mixture and the uniform mixture, I think it really unifies the look.
The awesome base if from Dragon Forge Design's Urban Rubble Wasteland product line.
This one was all done with a brush over white Tamiya spray primer. I may experiment with the trusty airbrush next.
Feldgrau and other concerns
On: 6.16.2010
So after doing far more research than necessary about the changes in German uniform colors from the late 1930s up through the end of WW2 (and effects of the sun and weathering on wool and dye, bla bla bla bla)... I've chosen what shade I'm going to use for my Waaaghin' SS.
This post will be a placeholder for my paint mixes and I'll edit it from time to time.
Skin
"Ork Skin Base" - Reaper MSP Pale Green
"Ork Skin Shadows/Wash" - Reaper MSP Pale Green:Muddy Olive = 1:1
"Final Highlight" - Reaper MSP Sunlight Yellow
Cloth
"Feldgrau Base" - Reaper MSP Rainy Gray:Muddy Olive = 3:1
"Feldgrau Shadows/Wash" - Reaper MSP Rainy Gray:Muddy Olive = 2:1
Leather
Base - Reaper MSP Dragon Black
Highlights - Reaper MSP Rainy Gray
Metal
"Helmet" - "Dunkel Apfelgrün" - Reaper MSP Rainy Gray:Muddy Olive = 1:1
"Gunmetal" - Reaper MSP Honed Steel
"Metal Highlights" - Reaper MSP Polished Silver
Vehicles and Equipment: Hinterhalttarnung Camouflage (Bloodaxes love the camo!)
"Dunkelgelb" - Reaper MSP Palomino Gold:Muddy Olive = 6:1
"Olivgrün" - Reaper MSP Muddy Olive
"Rotbraun" - Reaper MSP Russet Brown or Mahogany Brown (TBA)
Tank "Specks" - Dunkelgelb specks on the Olivgrün and Rotbraun areas, Olivgrün and Rotbraun specks on the Dunkelgelb (Tanks only)
"Typically" Yellow and Brown are separated by a green area but different units and factories painted it differently.
This post will be a placeholder for my paint mixes and I'll edit it from time to time.
Skin
Cloth
Leather
Metal
Vehicles and Equipment: Hinterhalttarnung Camouflage (Bloodaxes love the camo!)
Blitzkrieg
On: 6.15.2010
My 'Ooliganz may be taken over by a blitzkrieg of WW2 Orks...

http://kromlech.eu/?p=147
Joining my Waaagh very soon may be...
Lookskilly SS Ghazghkull Thraka (LSSGT)
1st Waaaghin' SS
In Ork Kultur, the Waaghin' SS are some of the most elite Orks of the Blood Axe clan. The letters "SS" is Blood Axe shorthand for "Stompystomp" which is a great description of what they do. The SS emblem is the Ork glyph for "Stomp" ... twice.
The 1st Waaaghin' SS LSSGT are Blood Axe Orks who are fantatically loyal to Ghazghkull Thraka.
The most famous member of the 1st Waaaghin' SS, is the greatest of the Kommandos... Sturmboss SchnichtRött (The Waaagin' SS have "ranks" formed by taking whatever Rank Orks are used to and just adding the Imperial Gothic word "Sturm" somewhere in the rank title... a custom that generally bewilders the rest of Ork Kulture).
I hope to have my first Waaaghin' SS painted soon.
Sneaky Panzies Oy
On: 3.03.2010
So last night was my first real battle against Sneaky Panzies aka "Dark Eldar" (I was in a 3 way battle that involved them but really in that one I was focused on the Space Wolves).
Zoinks!
I barely pulled out a win by virtue of it being annihilation and I always design my lists to minimize available kill points to my opponent. One lone Deffkopta held on until the end of turn 6 to deny the outright victory due to obliterating one's opponent. In other words "counts as a win" by scenario design, but I would say it's only an Ork Moral Victory at best.
I learned a lot and am slowly building up the momentum to just finish my Lootas that I've been waffling on.
The game was a lot of fun, the other highlight of the night was discovering a great Thai restaurant next door to the place where we were playing!
(Review) GW Trukk Kit how I love you...
On: 3.01.2010
...let me count the ways. :)
So, if anyone's taken the time to glance over my Ork blog it's fairly clear that like most Ork players... I like to Kustomize. I scratch built my Battle Wagons because I considered the official one too "weedy" and "grotlike" for my tastes (it's physical "presence" on the battlefield just wasn't up to snuff for this Warboss for the "carry 20 Boyz into battle" configuration... an inch or so of scaling in height and width prior to sending it to the printers would have made it just about perfect).
So, because I was so upset with the GW Battlewagon, I didn't give the regular "Trukk" kit a second thought. I figured if GW could screw up something so central to an Ork Waaagh as the Battle Wagon, the Trukk would have no hope. For the escalation league, I bought a Trukk kit. I figured... why not?
Pictures of my project here:
http://waaaghhound.blogspot.com/2010/02/painting-rust-on-trukk-and-skorcha.html
(only options used are Red Paint Job and Reinforced Ram)
Well... I've repented my prior opinion and just had to sing the praises.
1) The 6 Tires (or perhaps Tyres) are wonderful. So many tiny details are in each one that if GW would spin this out into its own sprue I'm certain they'd have Orky Mek buyers at (nearly) any price.
2) The basic vehicle frame, details and modeling of the suspension and drive system are amazing. It looks both Orkish and suits the well known Armor 10 rickety-ness of the Trukk at the same time. Minor details like a semi-truck trailer hitch socket as well as a tow hook/trailer hit hook really add to the look and feel.
3) The detailing on the engine and exhaust is top notch. Air intake, Toof bespeckled radiator, unbalanced cooling fan, nitro canisters, hoses, etc. are all minor details tucked away into this little bit. The fact that it sockets into the drivetrain so nicely shows the effort the original (3D?) artist took in the design.
4) The above go together like a dream. A few spots of glue and you're ready to go.
5) The detailing on everything else is about what I'd expect. It's top notch. The vehicle options included in the kit make it a great source for kustomization bits for down the road (wrecking ball, boarding planks, plates for extra armor, and the reinforced ram). And, like a "proppa" kit, it looks fine if you leave these options off.
6) The crew compartment has a hidden piece of hilarity. The driver's side and the gunner's cupola can be swapped. I guess US Orks drive on one side and UK Orks on the other. ;)
7) The Big Shoota cupola has rails and hooks so that if you don't wish to glue it down you don't have to (and it still sets in nicely). This is a huge bonus for actual play since you can now remove the cupola to represent weapon destroyed results. With careful application of glue, the gunner can even continue to rotate within the cupola ring like a turret.
8) With a Bullet… the biggest and best feature of this kit is… see points 1-4 above. This kit is probably the biggest boon to “kustom” vehicle Mek makers I’ve ever seen. The possibilities for building your own vehicle on top of the “canvas” (kanvas?) provided are nearly limitless.
However, this wouldn't be a 'proppa' review without a list of the stuff I didn't like.
1) The posing of the gunner's arms. It's very, very difficult to get the big shoota and the gunner's pose to come out looking anything like what the picture on the box suggests. If the pose matters to you, expect to have to do some cutting and greenstuff work. If you don't mind the gunner pose being one of the gunner hiding behind his own ammo drum, well then by all means just glue and go. :)
2) While the crew compartment can be swapped US/UK drivers side... only one side actually gives you enough room to glue the dashboard in easily. If the driver is on the left side, expect a tight fit and a few curse words if you don't assemble it in the correct order when you try to match the dashboard up with the “steering wheel” held by the driver.
3) For painting purposes, if a "competitive" (aka scoring) paint job is your goal - don't follow the printed directions. Assemble and paint separately: 1) frame/engine (don’t glue the tires on like the directions suggest), radiator, and right side exhaust (and reinforced ram if desired), 2) tires, 3) driver, dashboard, gunner cupola rails, and crew cabin, 4) gunner cupola (with wrecking ball if desired), 5) left side exhaust, 6) cargo area (with boarding planks if that’s your desire). Finish the 6 major parts, and then do final assembly after they’re all painted. Otherwise you will NOT be able to get a paintbrush everywhere you need it to go.
Anyway, I love this kit. If you're a Mek that loves to "kustomize" and haven't given the GW Trukk a try... I recommend biting the slugga one time and see if it doesn't spark your creative Squig juices in new and interesting ways.
Painting "Rust" on a Trukk and Skorcha Buggy
On: 2.28.2010
So I was experimenting with "rust" painting techniques all weekend. I bought and put together a real GW Trukk instead of scratch building (shocking I know). I also rummaged around my old box of Ork bitz and found a buggy in need of a home. I used one of my several dozen Kinder Surprise Eggs and turned it into a Skorcha buggy (like the "turret?" :) ).


Subscribe to:
Posts (Atom)